After successfully installing and steadily running Home Assistant you may wonder where to start setting things up, not only in sense of the user interface preferences but also the actual data inside the system. In this post I will try to give a some sort of feeling of how to tweak things under the hood without touching any home automation device or automation code yet.
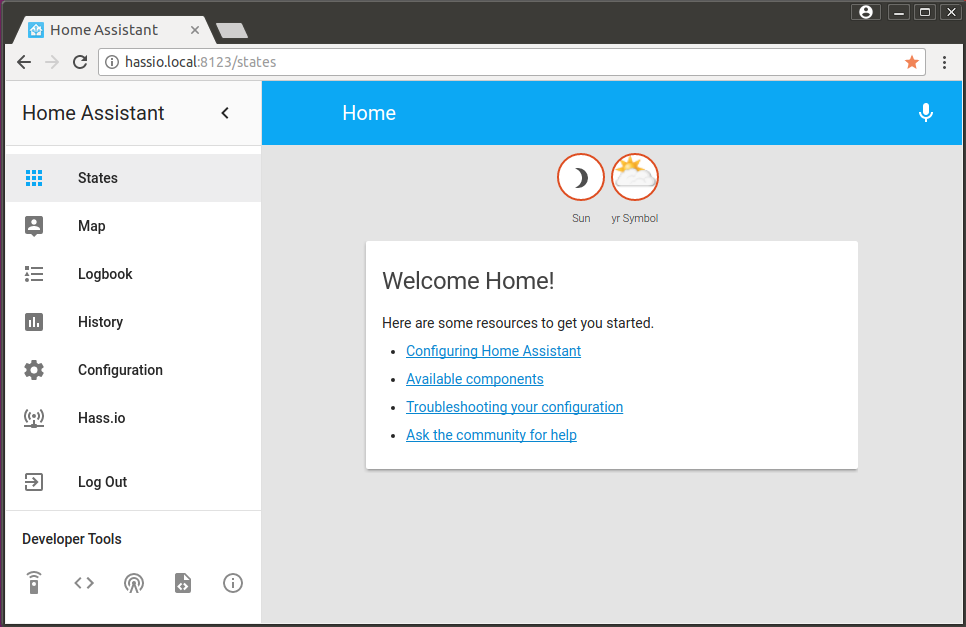
This is how your Home Assistant home screen may look like in your browser window:
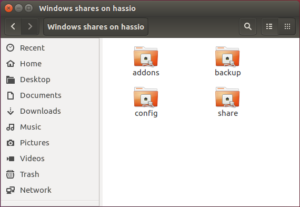
Make sure you have Samba installed. You should, in case you followed my previous blog post. However, if everything is all set, you should be able to find your Home Assistant folder via the Network/Windows share -directory in your local system. On Ubuntu it may look something like this:
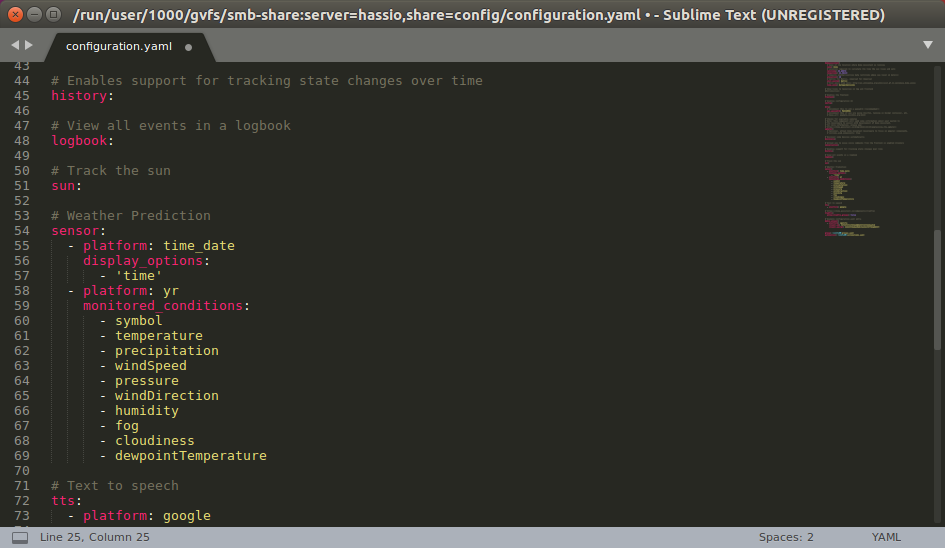
Open up the config -folder. There you can find configuration.yaml -file. Open it in your favorite text editor. I suggest you to do the following:
- Add correct latitude and longitude. It is not neccessary yet, but you can easily find them using Google Map. Also elevation may be revised.
- Add correct time zone.
- Comment out the line 15 introduction:, this will remove the welcome banner on the home screen. Before doing so, it may be good idea to look at the links provided, you may find them useful later.
- On line 25 or so, uncomment api_password and create a password. This ensures your UI is not accessible for outsiders.
Ok, now. Let’s try changing some sensor data. You should have as default the following lines:
# Weather prediction

sensor:

- platform: yr
Replace them by adding:
# Weather Prediction

sensor:

- platform: time_date

display_options:

- 'time'

- platform: yr

monitored_conditions:

- symbol

- temperature

- precipitation

- windSpeed

- pressure

- windDirection

- humidity

- fog

- cloudiness

- dewpointTemperature
Make sure you use right amount of white spaces, it is very important in yaml syntax. Direct copy pasting the code may not work. If you need a hint, look at the featured picture of this post.
After saving the changes, you must restart your Home Assistant. You can do it by selecting Restart in Home Assistant domain at Services page under Developer Tools tab in the UI. After rebooting you should see some more small icons on top of the view:

That is just an example how to configure sensors in your home screen without actually touching any real home automation devices.
You can continue exploring the possibilities by checking out the official documentation.
How to set up some real automation will be introduced in my next Home Assistant post, which will be out very soon.