In case you have very old Nextcloud installation on Kapsi server, it may stop working after the PHP version is upgraded on Kapsi servers. In thta case you may see a error message like:
This version of Nextcloud is not compatible with > PHP 7.2.
You are currently running 7.3.21-1+0~20200807.66+debian10~1.gbp18a1c2.
It is generally good idea to keep the cloud service software up to date, but in case you have forgotten to upgrade it, here is a short guide how to do it manually on a shared host using command line tool.
Usually I use Linux command line. But because I thought there might be also Windows users facing this problem, I show how to upgrade the Nextcloud instance using PuTTY on Windows. On linux machine you can do the same with the regular terminal app.
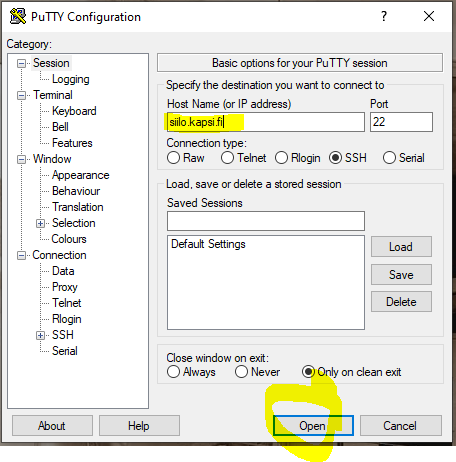
On Windows, download and install PuTTY software which allows you to create connection to your file base on Kapsi server. You can find the latest version here. After installation, open up PuTTY and type the Kapsi server location you aim to connect to. Then hit “Open”.
You need to type in your Kapsi username and password. After that you will see the welcome screen and you are able to navigate inside the file system. If you are new to command line, use the following tips to navigate:
ls = shows folders in the current location
cd xxx = enter to “xxx” folder
cd .. = go back one step in the directory hierarchy
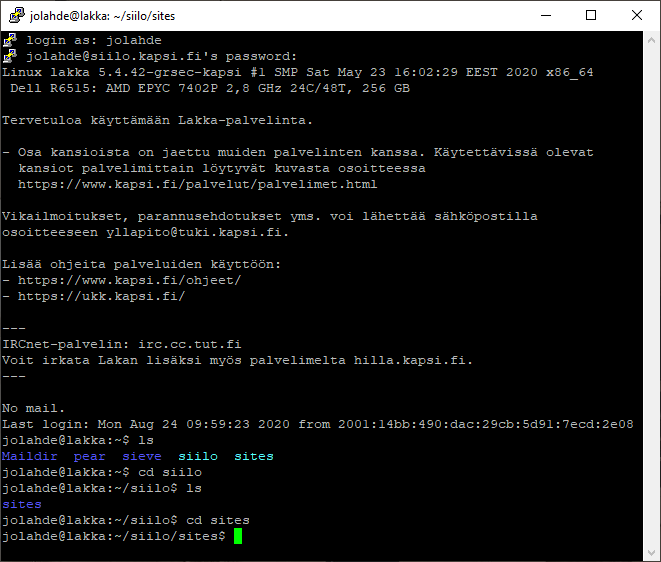
Navigate to the parent folder that directly holds the one directory containing the outdated Nextcloud installation files. When you are located in the parent folder, it is time to download the installation package. You may use the following command, but adjust the version number:
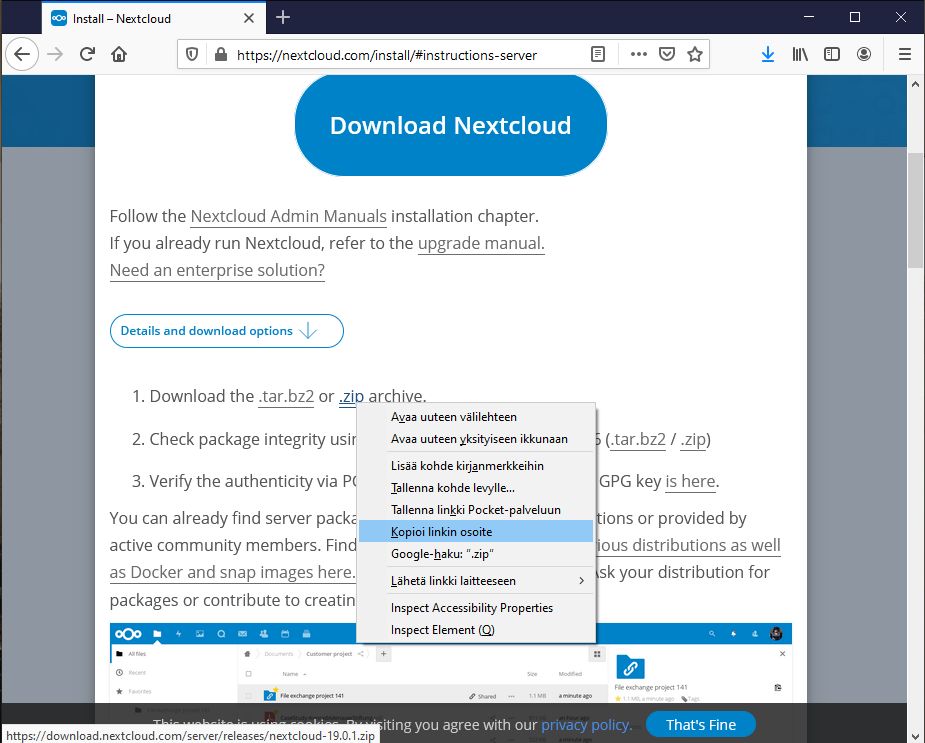
wget https://download.nextcloud.com/server/releases/nextcloud-19.0.1.zip
Note! The version in the command above is the latest one at the time of writing this, you should check the version you want to install. The easiest way is to copy the link from the website:
After the download is finished, unzip the package.
unzip nextcloud-19.0.1.zip
Then rename the old parent directory that contains the current Nextclud installation to something “-old”. You can do it by typing for example:
mv ~/siilo/sites/xxxx-siilo.kapsi.fi/www/ ~/siilo/sites/xxxx-siilo.kapsi.fi/www-old
And then rename the downloaded updated file directory to same as your Nextcloud installation used to be before.
mv ~/siilo/sites/xxxx-siilo.kapsi.fi/nextcloud/ ~/siilo/sites/xxxx-siilo.kapsi.fi/www
Then we follow the original guidance provided by Nextcloud, I directly refer the website:
Copy the config/config.php file from your old Nextcloud directory to your new Nextcloud directory. If you keep your data/ directory in your nextcloud/ directory, copy it from your old version of Nextcloud to your new nextcloud/. If you keep it outside of nextcloud/ then you don’t have to do anything with it, because its location is configured in your original config.php, and none of the upgrade steps touch it.
(If you are new to command line: copying can be done with command cp or you can also move the files and folders. Always write the full source and target location after the command.)
Check that your new folders have the same ownership and permissions. Permissions should be OK automatically if you followed this process but if you have problems, refer to Nextcloud manual for further details.
Now we can run the occ upgrade command. Because Kapsi server is a shared host service and we do not have sudo-access to it, we cannot use the command Nextcloud manual suggests (sudo -u www-data php occ upgrade).
As we know that Siilo server is using today (August 2020) PHP version 7.3. We can run the upgrade command by typing:
/usr/bin/php7.3 occ upgrade
If everything works as expected the PuTTY window should show multiple lines of green text as the upgrading process runs succesfully.
Note: if you are trying to upgrade over multiple major releases, you may get error message. That is why you should always try keep your Nextcloud up to date.